Your Cart is Empty
100% Human Hair On Sale + Free Shipping
100% Human Hair On Sale + Free Shipping
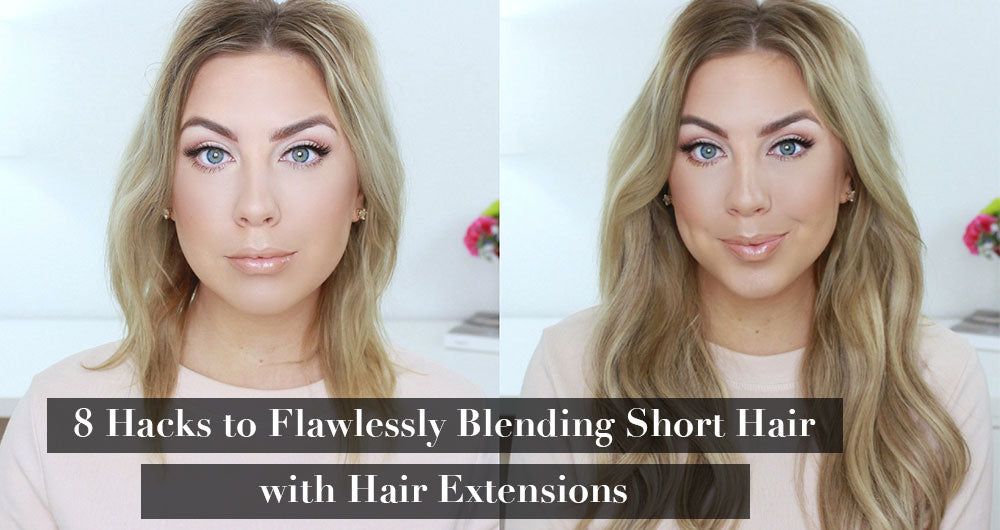
Blending short hair with hair extensions can be frustrating, stressful, overwhelming, and could lead to anxiety if self-blending.
Believe it or not, most professional hairstylists, beauticians and hair extensions specialist find blending short hair with extensions to be challenging and somewhat of a tricky task.
Blending hair is the act of merging hair and hair extensions into one flawless application.
Why is hair blending so important in relation to short hair? Blending allows short hair to attach seamlessly to hair extensions and disperse the appearance of separation (from hair to hair extensions).

There are several hair blending hacks used by many industry professionals. In this blog, I will share 8 of these hacks with you.
HACK 1
Blending Short Hair with Layers
When layers are added to hair, they create dimension, volume, and the illusion and appearance of thicker hair. Layers let shorter hair blend perfectly with hair extensions.
When layering AmazingBeautyHair hair extensions, having the proper tools is essential to creating impeccable and fabulous layers, therefore, before starting the layering process, you’ll need the tools listed below.
What you will need:

Step 1: Wash and blow-dry hair.
Step 2: Straighten hair with a flat iron - Complete this step only if your hair extensions are straight, if not, please move to the next step. If you’re not sure how to flat iron hair, watch a YouTube tutorial for instructions.
Step 3: Apply AmazingBeautyHair tape-in extensions or clip-in hair extensions. (If you are unsure how to install tape-in or clip-in hair extensions, here is a YouTube tutorial for instructions.)
If you’re using clip-in hair extensions, I would recommend spraying the roots of hair with hairspray before applying clip-in hair extensions. It’s easier to tightly attach/fasten metal clips to hair when hairspray is added to the roots of the hair before applying clip-in hair extensions.
Step 4: Prep hair extensions with a paddle brush, brush hair from top to bottom (ends of extensions) of head using a downward movement -Complete this step only if your hair extensions are straight. If not, please move to the next step.
Step 5: Divide hair into four portions. Use ear to ear width for each portion, once each portion of hair has been created, use a plastic hair clip to firmly secure each portion of hair in place.
Step 6: Unclip second portion of hair. The top portion is your hair and should not be cut, place a razor (comb) in the middle, firmly move razor in a downward motion. (This motion generates different lengths of hair.)
Note from Blogger:
*Each layer should be cut slightly longer than the following layer. Lift hair when layering to create volume
Step 7: Unclip third portion of hair, place a razor (comb) in the middle, firmly move razor in a downward motion.
Step 8: Use hair cutting shears to remove thin uneven strands of hair made by razor comb.
Step 9: Groom hair with paddle brush or fingers (If hair extensions are curly).
Step 10: Style hair as usual. If your hair extensions are straight, adding curls for voluptuous volume and layer visibility is a great option.
SHOP AMAZING BEAUTY CLIP IN EXTENSIONS
HACK 2
Blending Short Hair with Positioning
The correct positioning of AmazingBeautyHair tape-in or clip-in hair extensions is extremely important.
It’s the positioning that determines the outcome of the blending process.
If the hair extensions are placed too low from the top of the head, shorter hair will have a harder time merging with seamless hair extensions, this will also create a look of disproportion; the top portion of the hair will be shorter than the rest of the hair.

However, if the hair extensions are placed too high, not enough hair may be visible. If enough hair is not visible, you’ll quickly find your styling options to be quite limited.
What you will need:
Step 1: Wash and blow-dry hair.
Step 2: Straighten hair with flat iron. Complete this step only if your hair extensions are straight, if not, please move to the next step. If you’re not sure how to flat iron hair, find a tutorial on Google for instructions.
Step 3: Separate a medium-sized portion of hair from the top of the head using a rat tail comb. Utilize a U-shaped movement when separating hair. This movement will create a U-shaped part.
Step 4: Use a plastic hair clip to keep hair separated and firmly in place.
Step 5: Apply AmazingBeautyHair tape-in or clip-in hair extensions directly below parted U-shape. If you are unsure how to install tape-in or clip-in hair extensions, watch a YouTube tutorial for instructions.
If you’re using clip-in hair extensions, I recommend spraying the roots of the hair with hairspray before applying clip-in hair extensions. It’s easier to tightly attach/fasten metal clips to hair when hairspray is added to the roots of the hair before applying clip-in hair extensions.
Step 6: Once hair extensions have been applied, use a plastic hair clip to firmly secure hair extensions in place.
Step 7: Create an additional parted line of hair 2-3 inches beneath installed hair extensions, then apply hair extensions directly above parted line, repeat until you have achieved your desired look of thickness.
Step 8:Remove the plastic hair clip from the top portion of the hair.
Step 9: If the hair is straight, blend hair located at the top of the head with hair extension using a flat iron set at 450 degrees.
Step 9A: If hair is curly, use fingers to intertwine curly hair extensions with natural curls.
Step 10: Style as desired.
SHOP AMAZING BEAUTY TAPE IN EXTENSIONS
HACK 3
Blending Short Hair withFace Framing
Face Framing is another fantastic alternative to blending short hair with long hair extensions. This technique is done by creating different lengths of hair around the face using a razor or pair of hair cutting shears.

When a variety of lengths are added around the face, the presence of shorter hair becomes lost in the various lengths, making it easier to blend and less noticeable to the human eye.
What you will need:
Step 7: Use a plastic hair clip to keep the remaining hair separated. Do not place plastic hair clips on hair located in front of the face (hair that frames the face).
Step 8: Use a razor (comb) to create layers around the face, starting from one section then moving to the next section. Layers are created using a razor(comb) by applying razor (comb) to hair extensions then firmly moving the razor (comb) in a downward motion- The best starting point when adding layers would be the cheeks or the chin.
Step 9: Release hair extensions from plastic hair clips, then use a paddle brush to blend sections of hair together.
Step 10: Style hair as desired.
SHOP AMAZING BEAUTY HALO HAIR EXTENSIONS
HACK 4
Blending Short Hair Using Hair Care Products – Hair Putty
There are several hair care products available on the market that would make blending short hair with hair extensions a piece of cake. The problem is identifying these hair care products.
These hair care products are difficult to find because they weren’t created or intended for blending hair.

In the earlier days, most African American hairstylists or beauticians might have recommended using hair gel or even an oil-based product as a blending agent. The problem with both products is neither of these products is good for your Amazing Beauty Hair hair extensions.
I truthfully don’t recommend using any hair care products on your hair extensions. However, if you’re going to use a product for blending purposes, stay clear of gels (black, blue, clear, yellow, etc.) and oil-based products.
Please keep in mind that hair care products are created for the hair on your head, not the hair on your weft.
Haircare products can weigh hair extensions down and could even strip them of their natural healthy shine.
However, when a client requests that I use a hair care product to blend their short hair with the hair extensions, I use a hair putty.
Hair putty is 100% safe to apply to hair extensions. Hair putty can be purchased at your local pharmacy, beauty supply store, or from an online beauty supply retailer.
Several hair care companies make their versions of hair putty. From my experience with this product, no two hair putties are alike.
If your budget allows, I would recommend purchasing different brands of putty and testing them. Not all hair putties can sustain the difficult task of blending short hair.
What you will need:
Step 1: Wash and blow-dry hair.
Step 2: Straighten hair with Flat iron. Complete this step only if your hair extensions are straight, if not, please move to the next step. If you’re not sure how to flat iron hair, watch a YouTube tutorial for instructions.
Step 3: Apply AmazingBeautyHair tape-in or clip-in hair extensions. If you are unsure how to install tape-in or clip-in hair extensions, please watch a YouTube tutorial for instructions.
If you’re using clip-in hair extensions, I recommend spraying the roots of the hair with hairspray before applying clip-in hair extensions. It’s easier to tightly attach/fasten metal clips to hair when hairspray is added to the roots of the hair before applying clip-in hair extensions.
Step 4: Scoop a small pea-sized amount of hair putty using a finger.
Step 5: Transfer putty from finger to the palm of hand.
Step 6: Rub hands together for 10 seconds, this softens the putty and makes it transparent.
Step 7: Place hands flat against ends of hair, then push hands downwards to transfer putty from hands to ends (of hair) and hair extensions, make sure all ends are masked in putty using the technique explained above.
Step 8: Use a small tooth comb or hard bristle brush to finish blending putty into ends of hair and extensions.
Step 9: Done! Style hair as desired. Do not use flat iron on hair treated with putty.
SHOP AMAZING BEAUTY VIRGIN TAPE IN EXTENSIONS
HACK 5
Blending Short Hair Using a Mixture of Lengths
If you're not brave or bold enough to layer your AmazingBeautyHair hair extensions, or you just don’t have enough time to visit your favorite beautician or hairstylist, or maybe you don’t trust your beautician or hairstylist with a razor or a pair of hair cutting sheers, I’m happy to inform you there is an alternative to layering hair and it doesn’t involve the use of a razor or a pair of hair cutting shears.

You’ll be happy to know that the effect of layering can also be created using a mixture of different lengths of AmazingBeautyHair hair extensions. I recommend using 3-4 different lengths to create the perfect layering effect.
What you will need:
Step 1:Organize AmazingBeautyHair clip-in or tape-in hair extensions according to Lengths.
Step 2: Apply the shortest length of AmazingBeautyHair hair extensions to hair, then apply the second shortest length and so forth, the longest length of hair extensions should be the last length added. If you are unsure how to install tape-in or clip-in hair extensions, watch a YouTube tutorial for instructions.
If you’re using clip-in hair extensions, I recommend spraying the roots of the hair with hairspray before applying clip-in hair extensions. It’s easier to tightly attach/fasten metal clips to hair when hairspray is added to the roots of the hair before applying clip-in hair extensions.
Step 3: For straight hair: Use a flat iron set at 360 degrees to merge hair and hair extensions together.
Step 3A: For curly hair, use fingers to combine curls and curly extensions together.
Step 4: You’re all done! Style hair as usual.
VIEW AMAZING BEAUTY HAIR EXTENSIONS
HACK 6
Blending Short Hair Using Color Contrasting
I don’t know about you, but when I hear the word color contrast in reference to hair I totally get excited.
Step 1: Straighten hair with flat iron. Complete this step only if your hair extensions are straight, if not, please move to the next step. If you’re not sure how to flat iron hair, watch a YouTube tutorial for instructions.

Step 2: Apply the color of Amazing Beauty Hair clip-in or tape-in hair extension that matches your hair color. If you are unsure how to install tape-in or clip-in hair extensions, watch a YouTube tutorial for instructions.
If you’re using clip-in hair extensions, I recommend spraying the roots of the hair with hairspray before applying clip-in hair extensions. It’s easier to tightly attach/fasten metal clips to hair when hairspray is added to the roots of the hair before applying clip-in hair extensions.
Step 3: Apply the second color of AmazingBeautyHair clip-in or tape-in hair extensions. Each row of extensions should be applied 2 inches below the first rows of installed extensions. Use plastic hair clips to firmly hold hair extensions in place while you apply the second group of extensions.
Step 4: Use a paddle brush to blend color together.
Step 5: Style as desired.
SHOP AMAZING BEAUTY CURLY CLIP IN EXTENSIONS
HACK 7
Blending Short Hair Using Hair Tucking
Hair tucking is a great alternative technique to hair blending.
Hair tucking is done by using large or oversized bobby pins to pin down and secure short hair.

Hair tucking prevents shorter pieces of hair from peering through hair extensions.
Hair tucking can only be accomplished using hair located at the sides, back, and middle of the head.
Hair tucking cannot be used on hair located at the top of the head. The hair located at the top of the head is meant to cover or hide hair extensions, this hair still needs to be blended.
But if you think about it, blending one section of hair is a whole lot better than blending multiple sections of hair, LOL.
What you will need:
Step 1: Wash and blow-dry hair.
Step 2: Straighten hair with flat iron. Complete this step only if your hair extensions are straight, if not, please move to the next step. If you’re not sure how to flat iron hair, watch a YouTube tutorial for instructions.
Step 3: Apply AmazingBeautyHair tape-in or clip-in hair extensions. (If you are unsure how to install tape-in or clip-in hair extensions, watch YouTube tutorial for instructions.)
If you’re using clip-in hair extensions, I recommend spraying the roots of the hair with hairspray before applying clip-in hair extensions. It’s easier to tightly attach/fasten metal clips to hair when hairspray is added to the roots of the hair before applying clip-in hair extensions.
Step 4: Once hair extensions have been installed, flip hair extensions upward and apply plastic hair clip to secure position; short hair should be exposed.
Step 5: Apply bobby pin by twisting bobby pin open, then slide bobby pin underneath short hair.
Step 6: Repeat step 5 until short hair has been completely tucked away. If you can, it’s a good idea to use Bobby pins that match the color of the extensions.
Step 7: Style as desired.
HACK 8
Blending Short Hair Using Multiple Hair Extensions – Thicker Hair
Using multiple AmazingBeautyHair clip-in or tape-in hair extensions can create the illusion of thicker, fuller, and healthier hair.
In relation to blending short hair, it’s 10 times easier to blend short hair with thicker hair.
If hair extensions are thicker than the short hair, the short hair will blend seamlessly into the hair extensions.

What you will need:
Step 1: Wash and blow-dry hair.
Step 2: Straighten hair with flat iron. Complete this step only if your hair extensions are straight, if not, please move to the next step. If you’re not sure how to flat iron hair, watch a YouTube tutorial for instructions.
Step 3: Apply AmazingBeautyHair tape-in or clip-in hair extensions. (If you are unsure how to install tape-in or clip-in hair extensions, watch a YouTube tutorial for instructions.
If you’re using clip-in hair extensions, I recommend spraying the roots of hair with hairspray before applying clip-in hair extensions. It’s easier to tightly attach/fasten metal clips to hair when hairspray is added to the roots of the hair before applying clip-in hair extensions.
Step 4:Brush AmazingBeautyHair hair extensions with paddle brush to evenly distribute extensions.
Step 5: Style hair as desired.
 2023 Trending Hairstyles On Tik Tok And Instagram For Black Women
  The Best Shampoo And Conditioner For Hair Extensions
  The Psychology of Hair Extensions
  How Hair Extensions Can Be A Game-Changer for Special Events
  Beyond Length: Creative Uses of Hair Extensions for Volume and Texture
  How To Get Your Extensions to Seamlessly Blend With Your Natural Hair
  The Science of Hair Extensions: Understanding the Hair Extension Process
  5 Great Ways To Keep Your Natural Hair Moisturized
  9 Hairstyles For Every Holiday Mood
  10 Wedding Hair Tips And Tricks Every Girl Must Know


